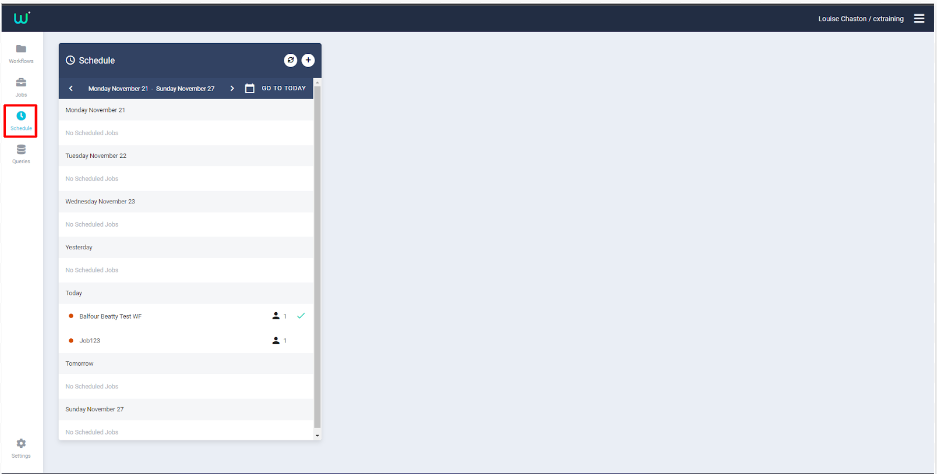
The Schedule can be viewed via the navigation panel on the left hand side of your Dashboard. The scheduler feature allows owners or administrators to schedule jobs to be completed by a specified user-determined either by their start date or an open-ended date.

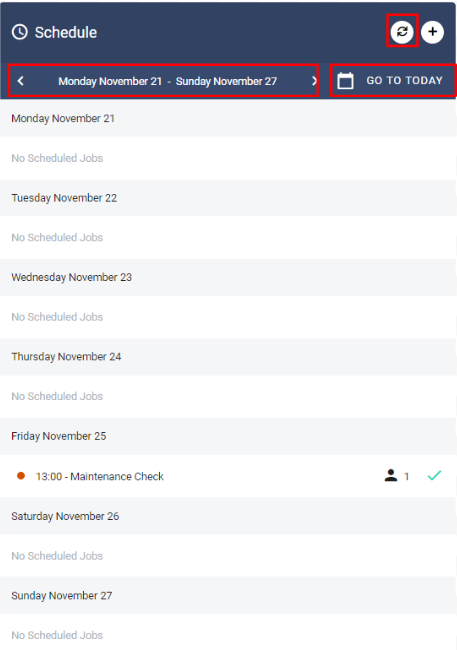
The Schedule Panel will show a list of scheduled jobs in a weekly view. To change which week you are viewing, select the arrow to either go back to view historic scheduled jobs and their status or forward to see future scheduled jobs.
To refresh the list, select the refresh button in the top navigation bar of the scheduler panel.
To navigate back to the current week, select go to today, this will bring you back to your current week view.

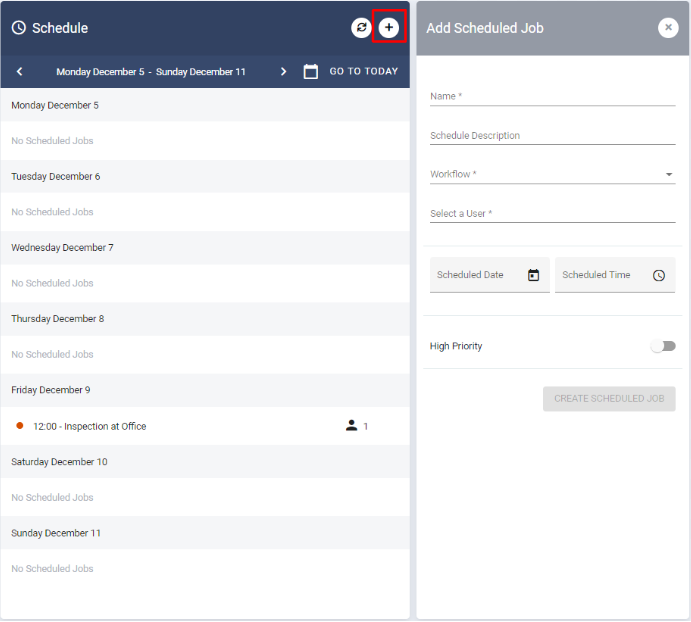
To schedule a job, select the plus button in the top navigation bar of the scheduler panel. This will open the add scheduled job panel where you can enter your job details and select the workflow template that should be attached to the job.

Give the job a name. This might be a simple name or it could be a work order number for example if your business has a specific reference to use.
Schedule description
Give the job a short description so that the assigned person is clear on what they have to do.
Workflow
Select the workflow that you would like the user to follow from the dropdown list of live workflows.
Select a user
From here you can select an individual user that you wish to assign this scheduled job to. The selected user must be added to the workflow to enable them to see the scheduled job. (see SETTING WORKFLOW PERMISSIONS for more information).
PLEASE NOTE: If the user is not added to the workflow an error message will flag up when you select Schedule Job, this will prompt you to add them, select 'yes' and this will add your selected user to the workflow.
Start date and time
Select the date you want the job to start by. Once a date is selected you can change this date by clicking on the date, this will open the calendar for you to select an alternative date. If you do not want to add a scheduled date you can leave this empty or select clear the scheduled date.
To set the time you want the job to be completed by simply type the time in. The format for this is 24 hours and so 5 am is 5:00 and 5 pm is 17:00.
Priority
Preset the priority of the job by using the toggle. A red icon is shown against high priority jobs in the application so the user can select the next work item correctly.
Once you have entered the above you can select CREATE SCHEDULED JOB’.
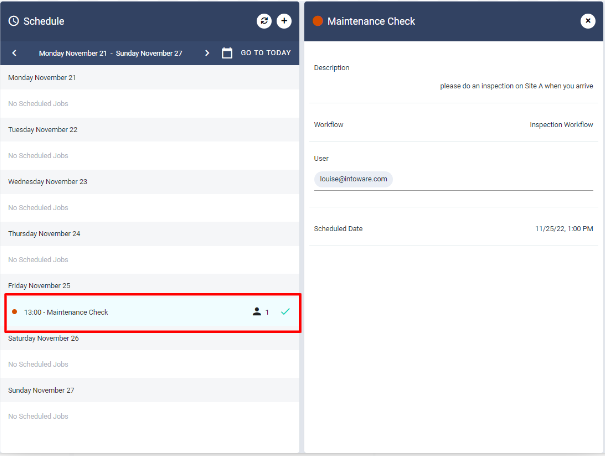
To view the scheduled job you can return to the main scheduler panel, navigate to the date that you scheduled the job to be completed by and select the job you want to view.

Scheduled jobs will show on the user’s WFP APP when they log in.

When the job is completed the Schedule Panel will update to show a tick.

Scheduling Jobs